Linking Mobility/Additional Constraints to Transport 360
When a new mobility constraint or additional constraint is created in OBS, it does not immediately sync to Transport 360. The constraint must first be linked to a booking that has been synced to Transport 360 before it becomes available within the scheduling platform.
However, users can proactively create that additional/mobility constraint in Transport 360 and assign it to the required vehicles/runs. When a booking with the constraint passes through to Transport 360, it will automatically link up to the constraint/attribute in Transport 360 if the name and code matches.
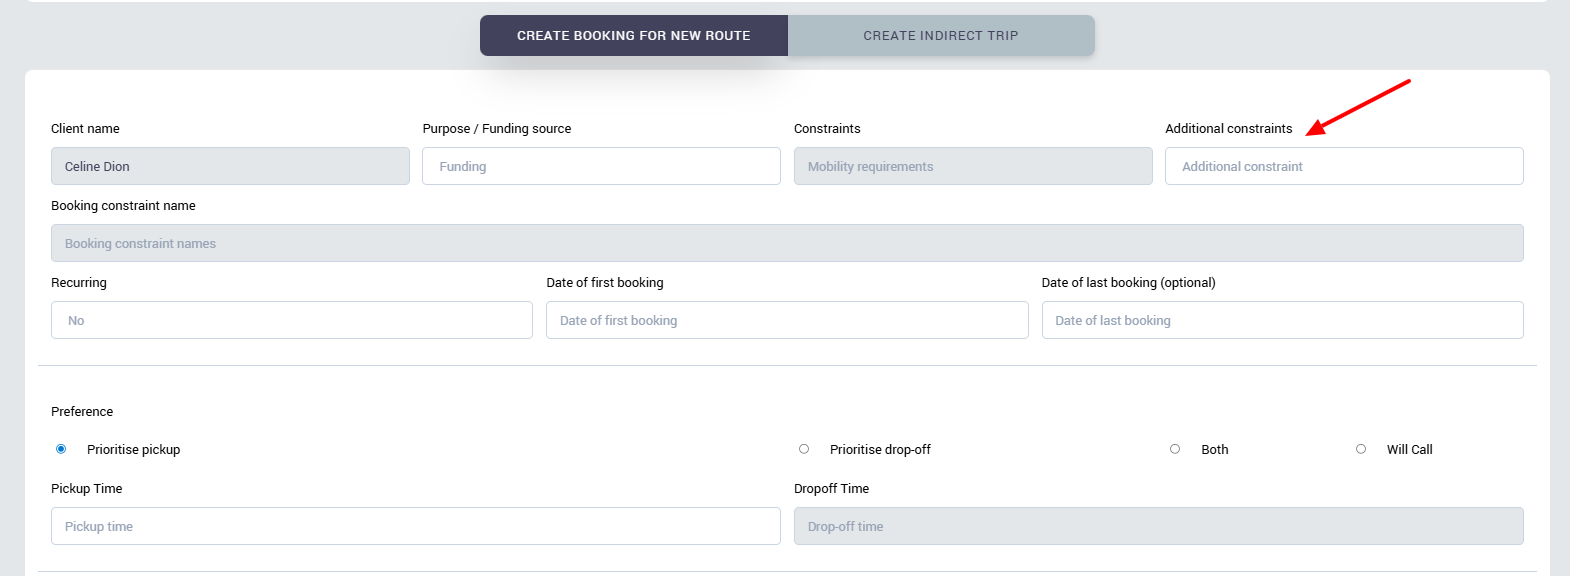
When a booking is created in OBS, any mobility or additional constraints are passed through as an Order Attribute in Transport 360 when the booking syncs across.
To ensure these bookings are scheduled correctly, users must create a corresponding Run Attribute in OLMS and link it to the Order Attribute. Once linked, ticking the “Compatible” checkbox confirms that bookings with that attribute can be assigned to runs (vehicles) with the matching run attribute.
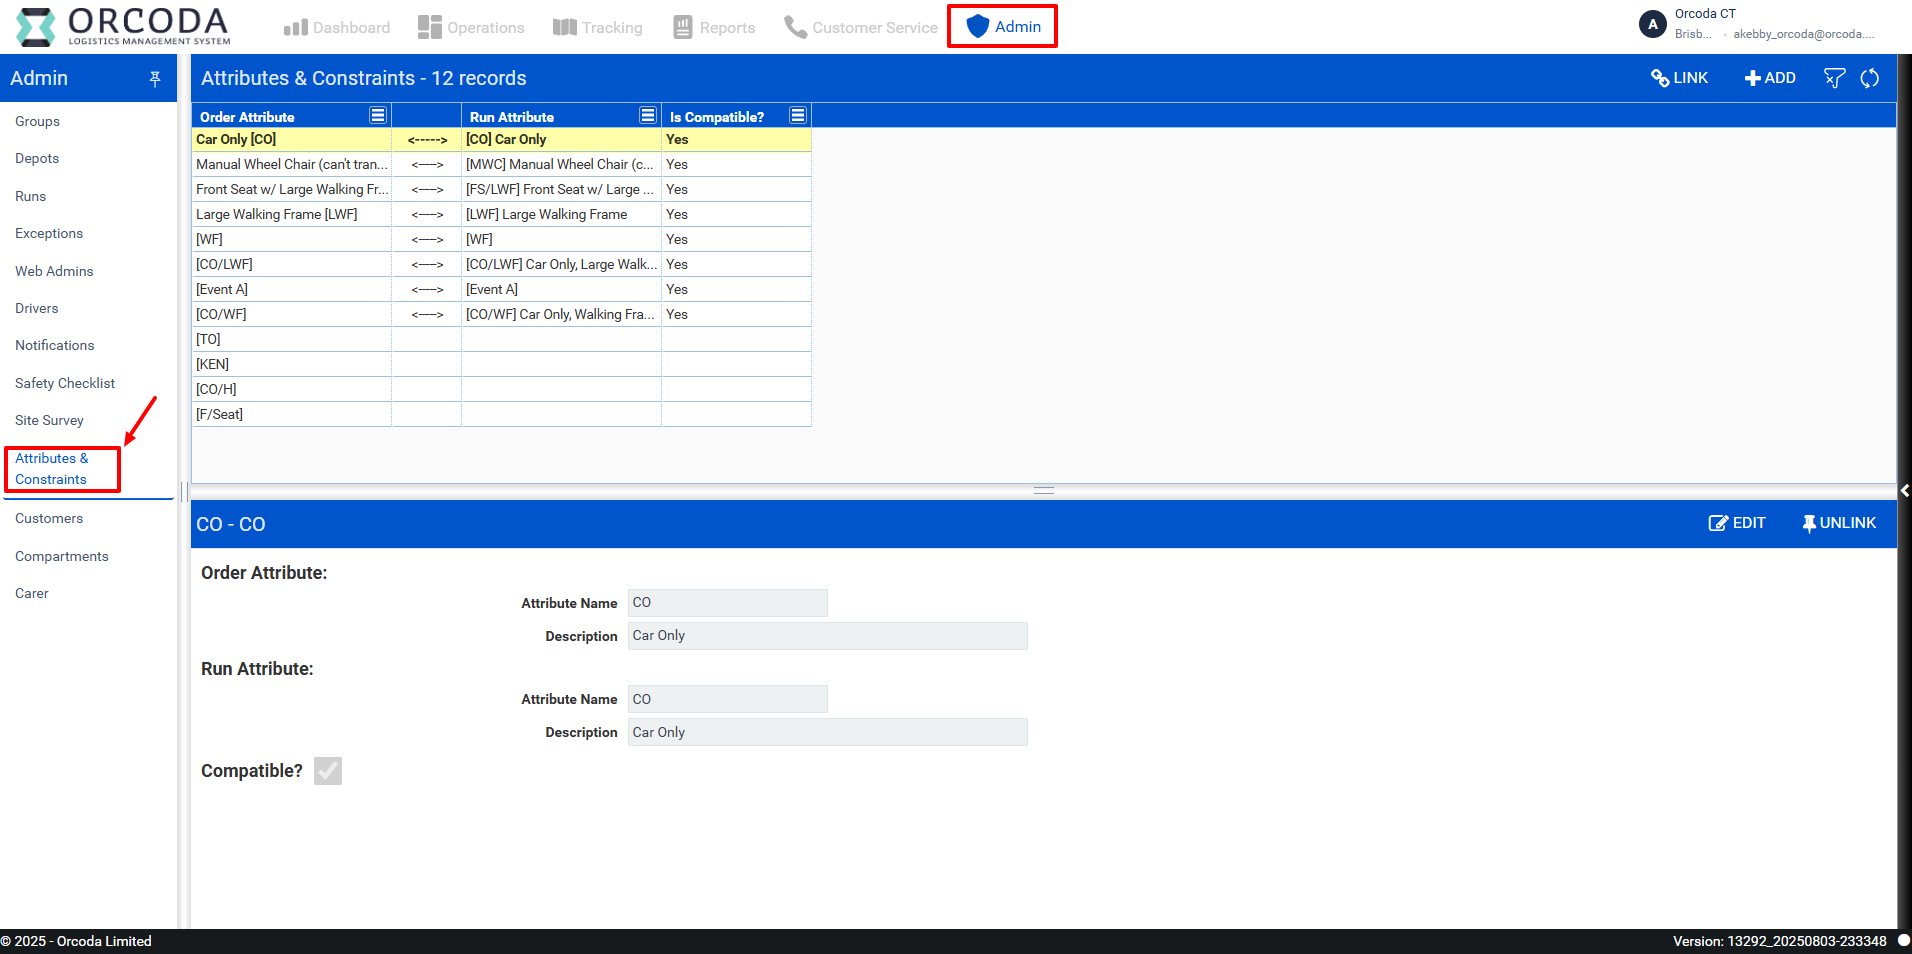
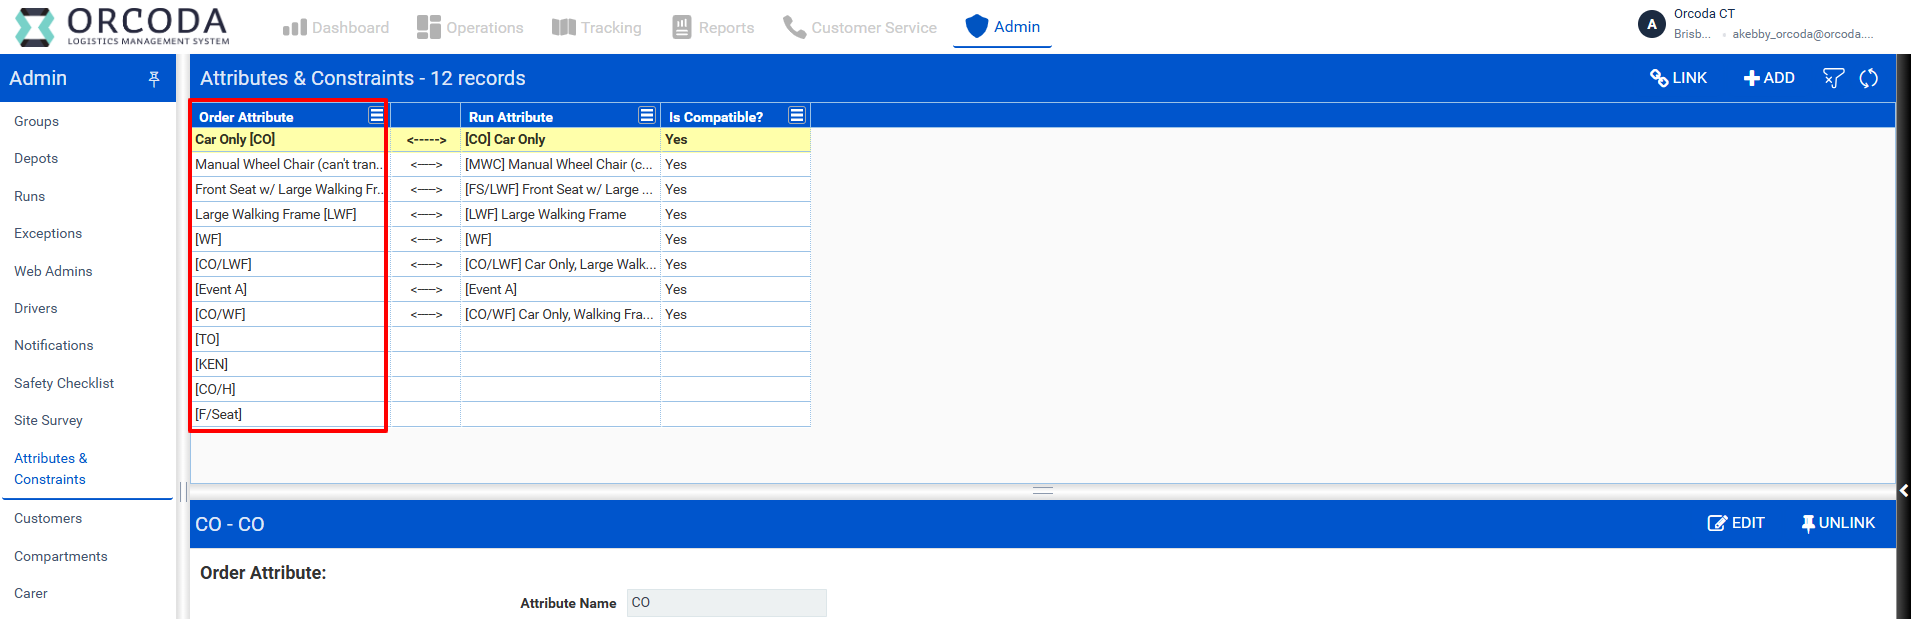
Attributes and Constraints can be linked up from the Admin page in Transport 360 as shown below:
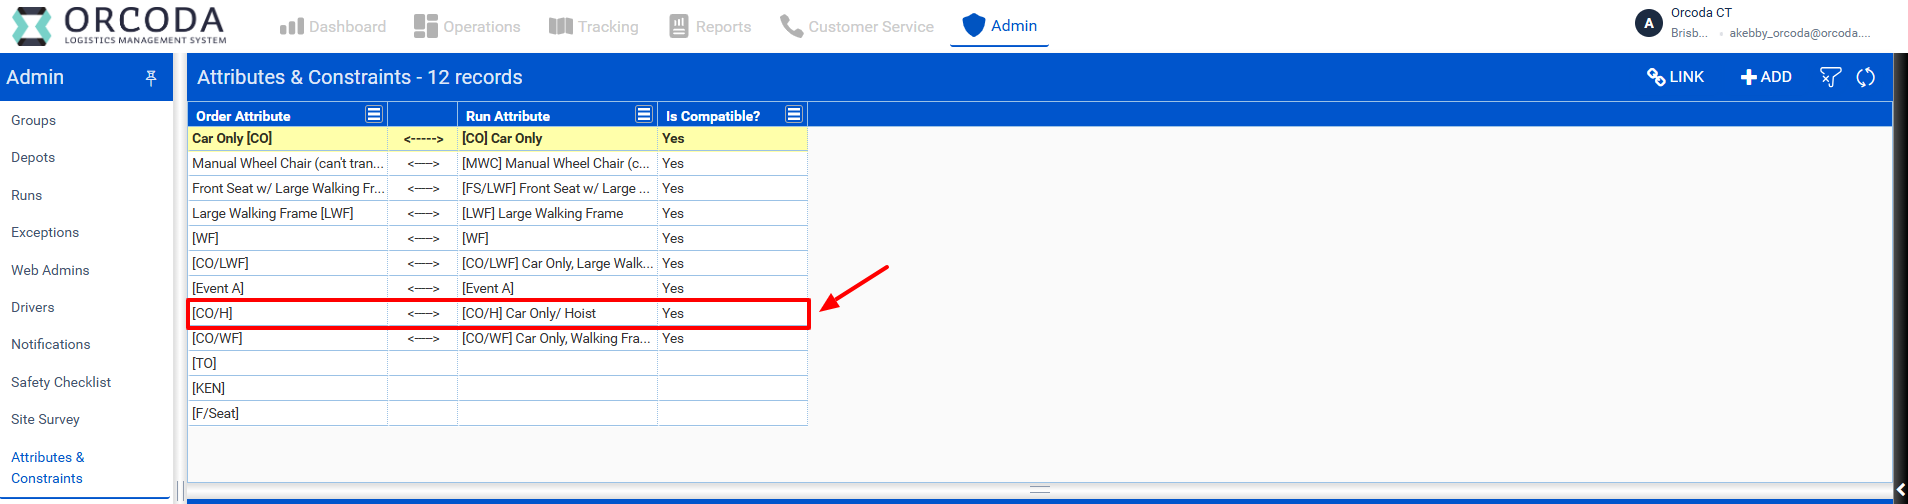
If a booking has come through from OBS with a new constraint, it will be displayed in the Order Attribute column as shown below.
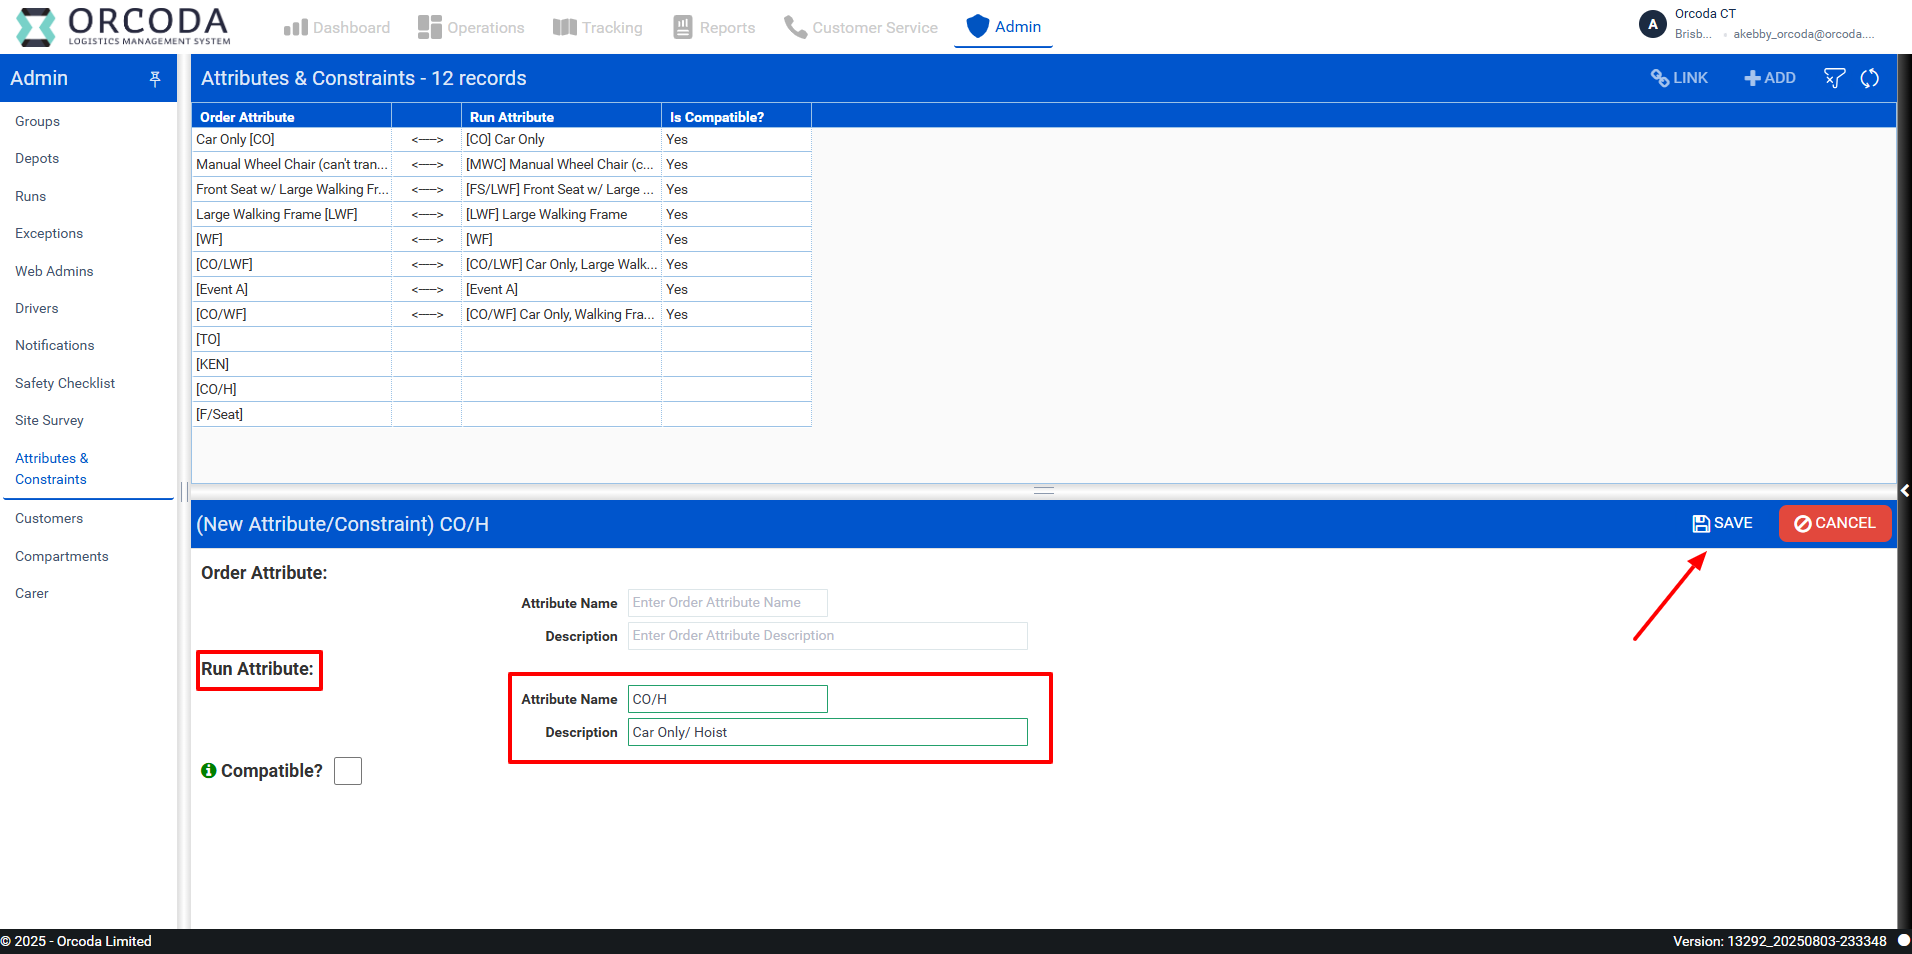
The user will now need to create a Run Attribute with the same details, and then link the Order Attribute to the Run Attribute.
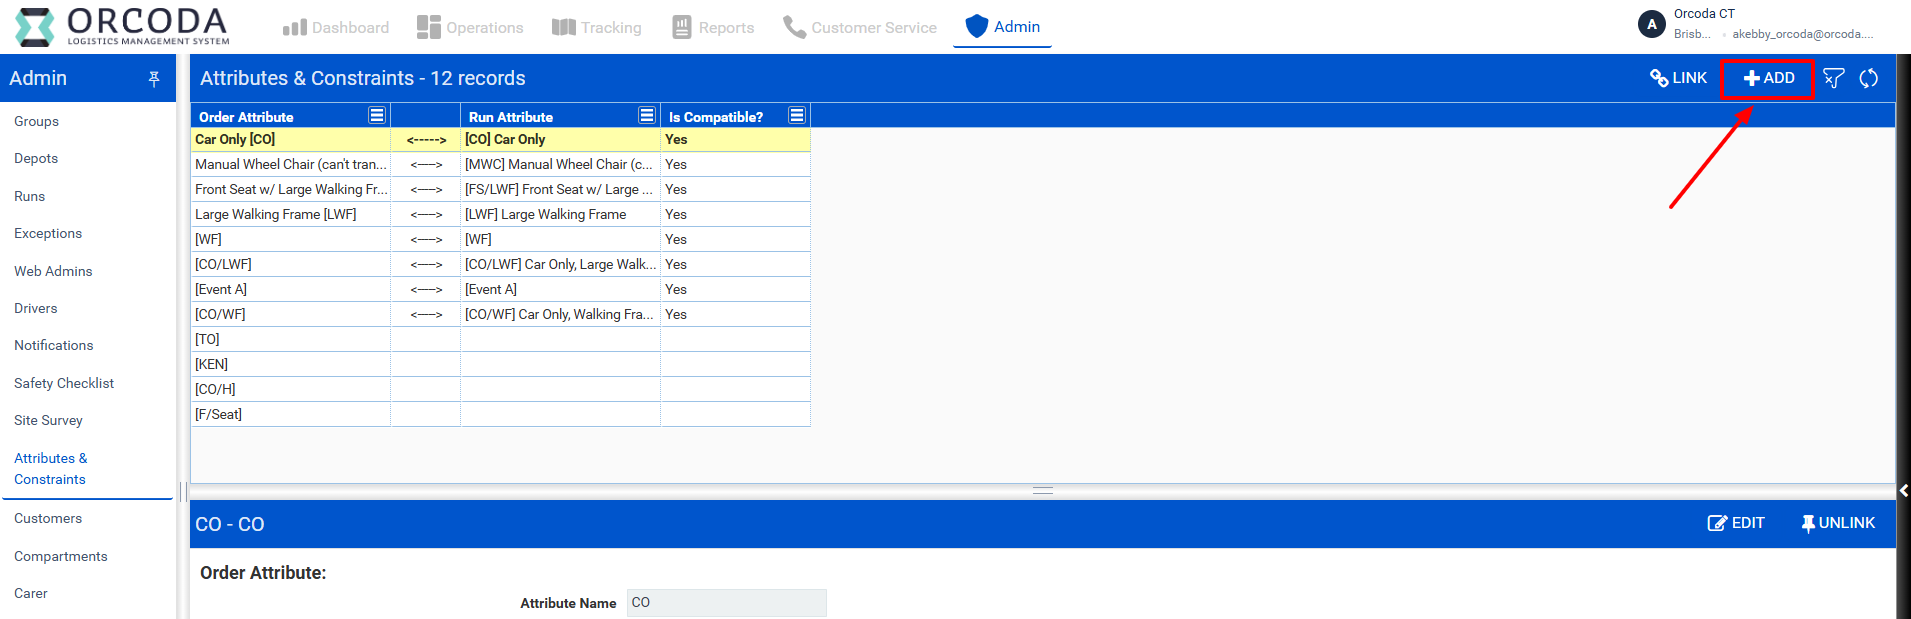
Attributes can be added by selecting the "+ADD" button on the Attributes & Constraints page as shown below:
In this example the "CO/H" order attribute was passed through from OBS with a booking, this means that the user will only need to create a matching "Run Attribute" and then link the existing "Order Attribute" to the new "Run Attribute".
Once the Run Attribute has been created, users must link the Order Attribute to the corresponding Run Attribute by clicking the "LINK" icon, selecting both attributes, and marking them as "Compatible" as illustrated below.
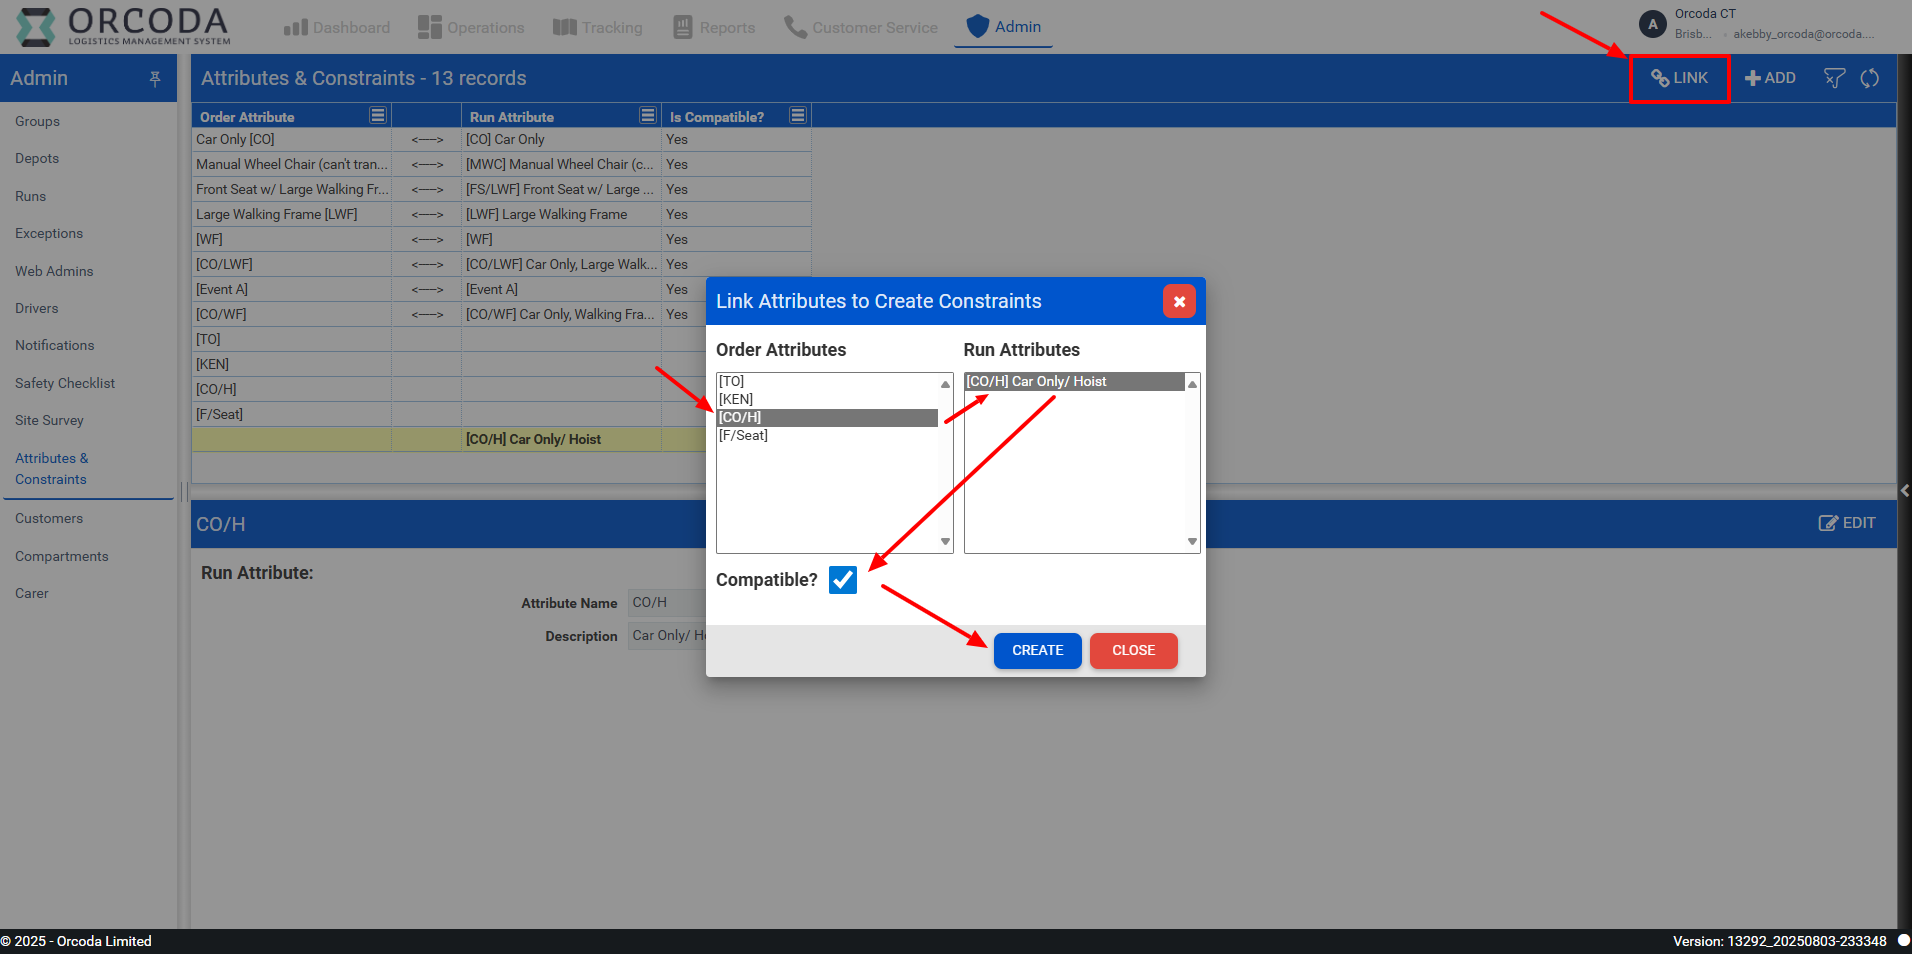
Once the above step has been completed, the order and run attributes will appear linked on the Attributes & Constraints page as shown below:
w